

How To Install And Deploy Windows 10 Image With Wds
what isWindows Deployment Services?
With the increase in the number of information engineering (Information technology) solutions in organizations, the number of physical and virtual server images have also increased. Due to this state of affairs, operating system deployments accept longer to complete and require valuable organizational resources. As a event, companies are looking for new ways to automate the server deployment process.
Virtual machine environments have become ubiquitous in the datacenter, and having the ability to deploy virtual server roles and workloads while deploying operating systems is an important office of the deployment procedure.
It provides the following functions:
• Allows yous to perform network-based operating system installations.
• Simplifies the deployment procedure.
• Supports deployment to computers that accept no installed operating system.
• Provides end-to-end deployment solutions for both client and server computers.
• Uses existing technologies, such as Windows PE, Windows image file (.wim) and virtual hard disk drive (.vhd and .vhdx) prototype files, and image-based deployment.
Infrastructure Requirement :
- 1 DC SERVER(DC-CLOUD) ADDS, DNS, DHCP, WDS.
- i NewhelpTech Server PC No Operating Arrangement
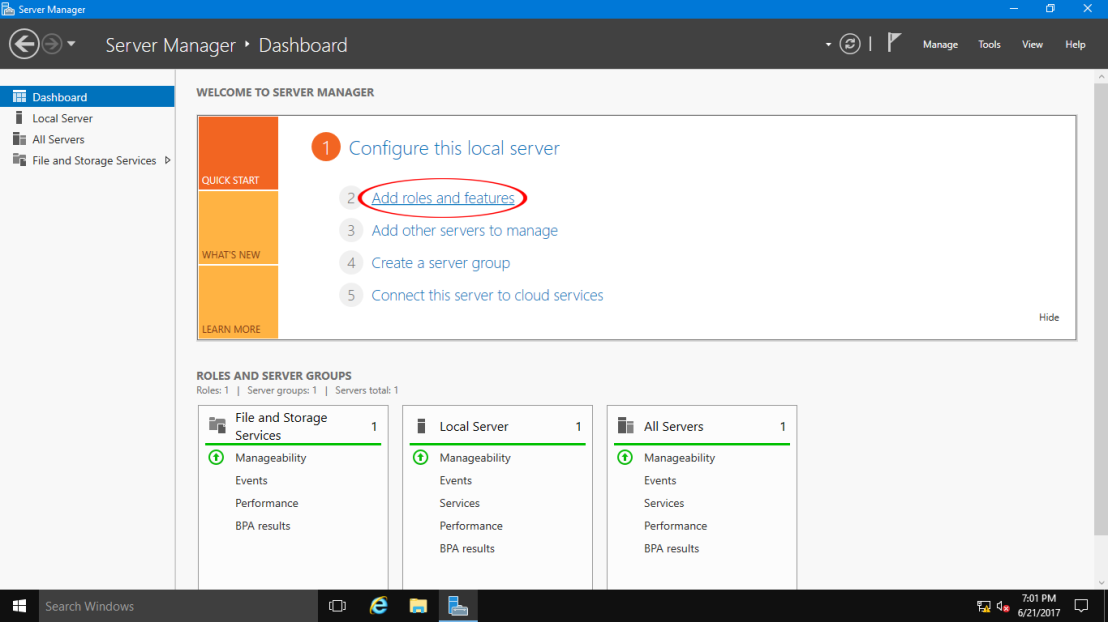
1 – Open Server Manager and then on the Dashboard clickAdd Roles and Features.
2 – Side by side, In the Add Roles and Features Wizard box, clickNext.

iii – On the Select installation type page, verify that yous cullPart-Based or feature-based installation so click Next.

four – Now select desired server you lot'd similar to install Windows Deployment Services on.

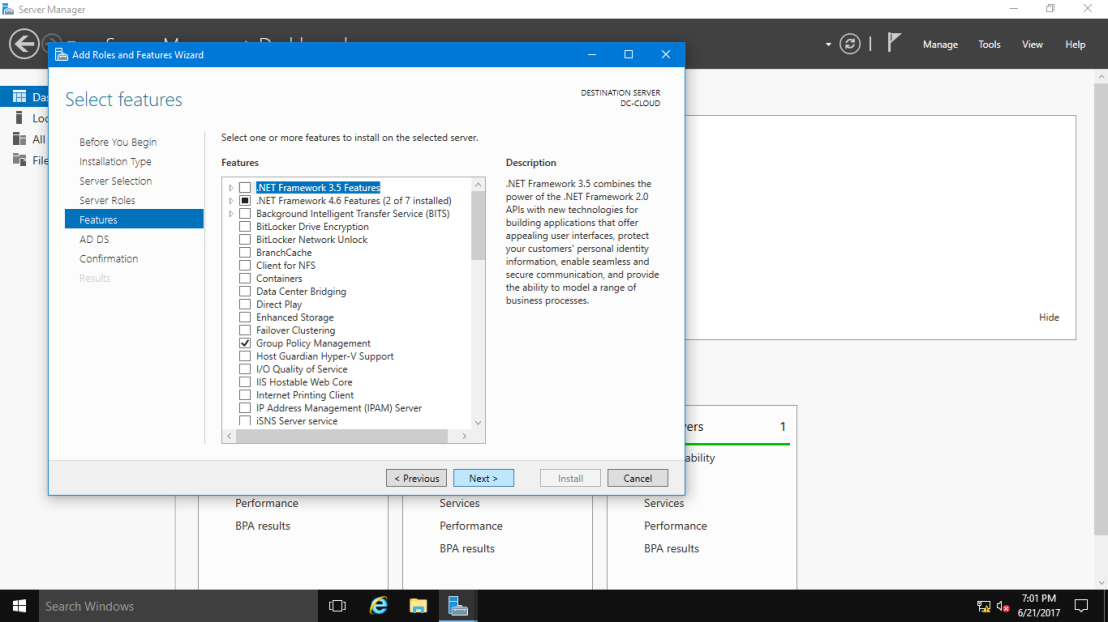
5 – On the Select server roles page, select theWindows Deployment Services ClickAdd together Featuresin the popup window so click Next.


vi – On theSelect features box, clickSide by side.
7 – On theWDS box, review the information presented, and then proceed withAdjacent.

8- On theSelect function services box, clickNext.

9 – On theOstend installation selections box, clickInstall.

10 – Once installation of WDS successful, but clickShut.

11 – Next footstep, we need toconfigure Windows Deployment Servicesouth, open up yourServer Manager, click Tools, and then clickWindows Deployment Services.

12 – on the Windows Deployment Services console, double clickServers, then right-clickDC-CLOUD.Windows.ae, then clickConfigure Server.

13 – On the Before You Begin box, clickNext to keep.

14 – On the Install Options folio, verify that you chooseIntegrated with Active Directory and so clickNext.

fifteen – On theRemote Installation Binder Location folio, you can have the default location which isC:\RemoteInstall and and so clickAdjacent.

16 – on the Arrangement Book Warning dialog box, clickYes.

17 – Next, on thePXE Server Initial Settings box, clickRespond to all customer computers (known and unknown), and then clickNext, delight wait for few second for the process to complete.


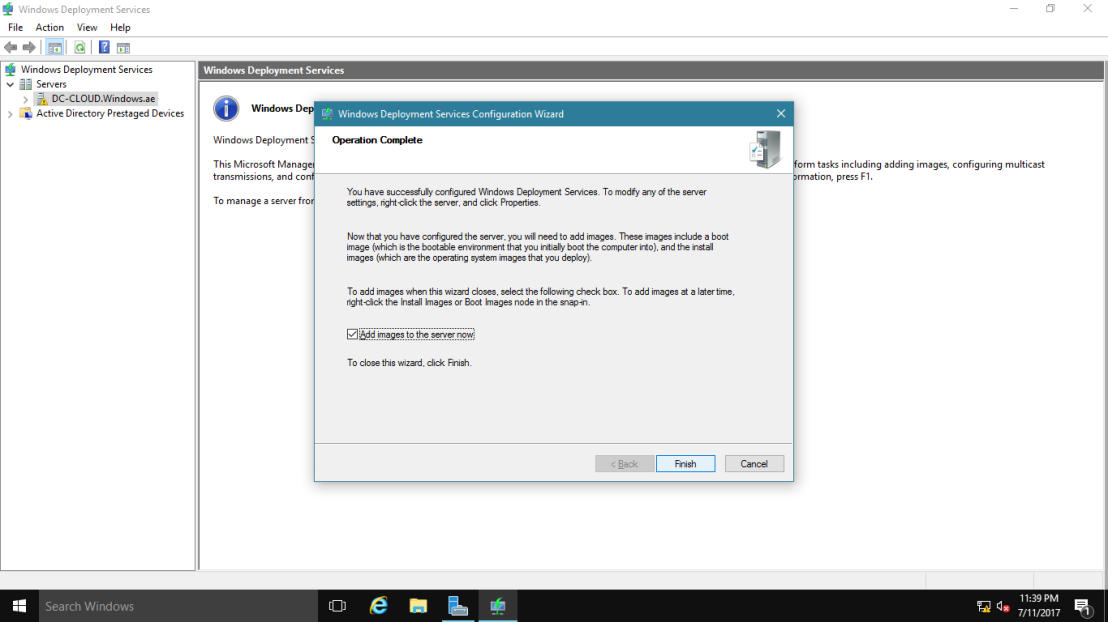
xviii – Side by side, on the Functioning Complete box, delightclear the Add images to the server now check box, and then clickTerminate. (I will manually add the Server in the next step).
19 – Before we proceed, please make sure that you already insert your Windows Server 2022, either DVD and ISO format if yous are using Hyper-5.

20 – Our side by side step is to add a boot image into WDS console, so in Windows Deployment Services console,double click DC-CLOUD.Windows.ae and thenright-click Boot Images, and then click Add Boot Prototype.

21 – On the Add Paradigm Wizard, on the Paradigm File page, clickScan, so inSelect Windows Image File box,double-click DVD Bulldoze (D:), double-click sources folder, and and then double-click boot.wim.

22 – On the Image File box, verify the File Location which isD:\sources\boot.wimand so clickNext.

23 – On theImage Metadata box, clickNext.

24 – On theSummary box, clickNext.

25 – On theJob Progress folio, clickEnd.

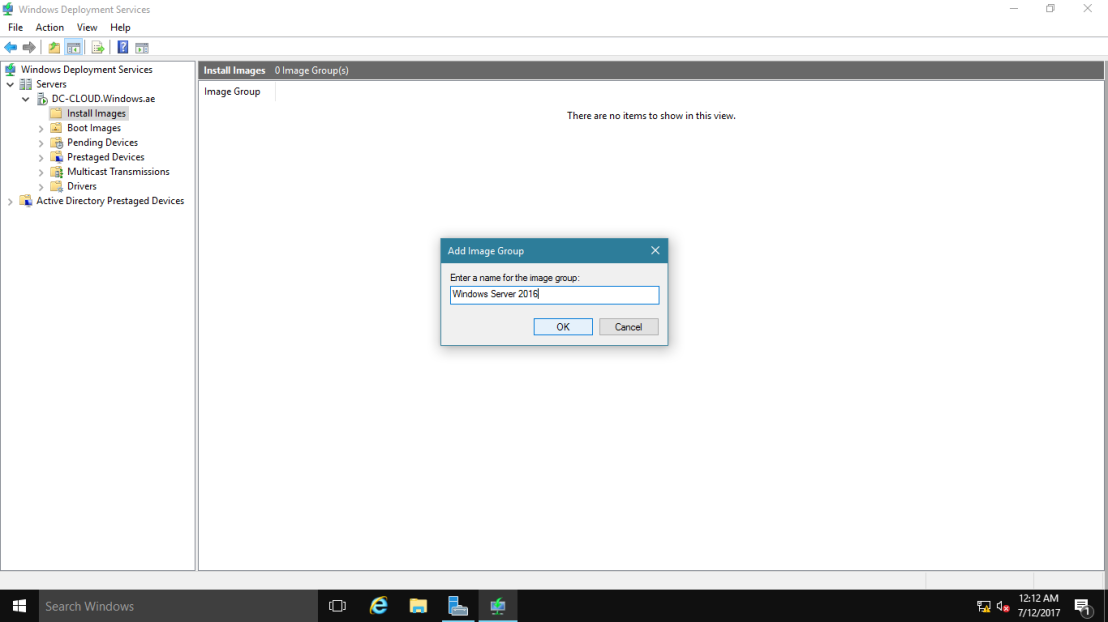
26 – Once you successfully completed add a boot paradigm into WDS, next yous need to add together aninstall paradigm into WDS, so in the WDS console, right-click Install Images, and then clickAdd Image Group.

27 – In the Add together Image Group box, type Windows Server 2022, and so clickOK.
28 – Next, on the WDS console, right-click Windows Server 2022, and and so clickAdd together Install Image.

29 – In the Add together Image Wizard box, browse toD:\sources\install.wim then clickNext.

30 – On the Available Images box,select Windows Server 2022 SERVERDATACENTER just, and then clickNext to proceed.

31 – On the Summary box, clickNext andwait for few minutes for the process to exist completed.

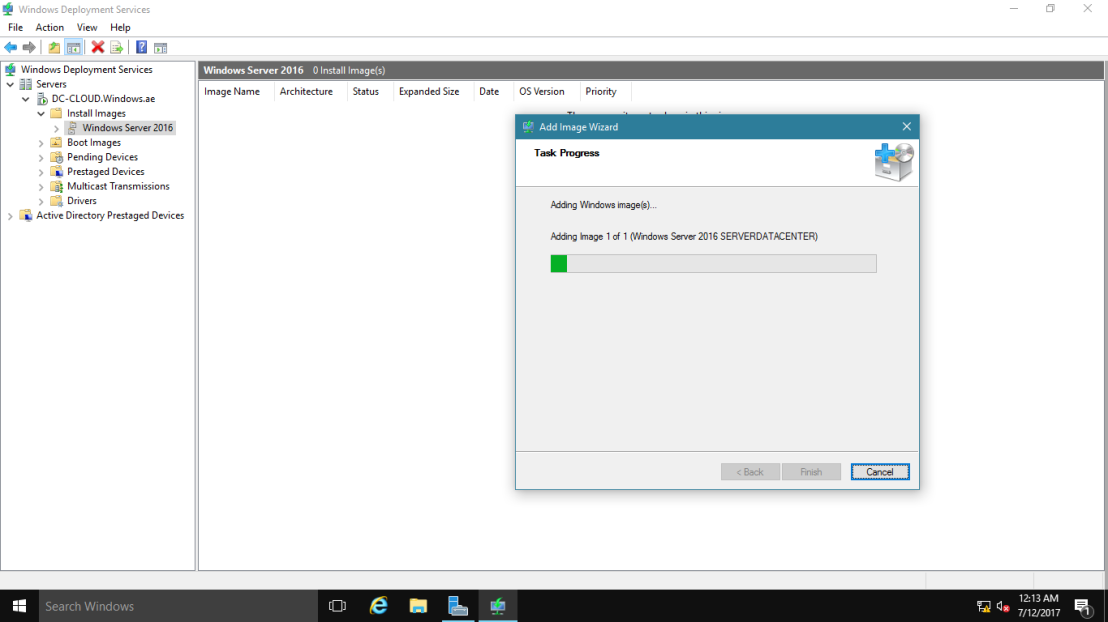
32 – On the Task Progress box, clickCease.

33 – In WDS,right-click DC-CLOUD.Windows.ae, then clickBackdrop.

we need configureAdministrator approval for this deployment to go along, meaning is I just wants mySifad NewHelpTech Ambassador todeploy this server.
34 – Click the PXE Response tab, and thenSelect the Require administrator blessing for unknown computers check box. On thePXE Response Delay, I cull iii seconds, and then clickOK.

35 – Next, open upWindows PowerShell, and type this control :
WDSUTIL /Set-Server /AutoAddPolicy /Bulletin:"Sifad NewhelpTech Server Admin is authorizing this asking. Please wait."


Next, return to our WDS server , what we will exercise now is to configure a WDS server for multicast manual ( Multi-casting enables you to deploy an image to a large number of client computers without consuming excessive network bandwidth ).
36 – In WDS,correct-click Multicast Transmissions, and then clickCreate Multicast Transmission.

37 – Next, on the Transmission Name box, in theType a name for this transmission field, type NewHelptech Blog Server 2022, and then clickSide by side.

38 – On theEpitome Choice page, in theSelect the image group that contains the image list, click Windows Server 2022, then in the Proper name list, clickWindows Server 2022 SERVERDATACENTER, and then clickNext.

39 – On the Multicast Type box, verify thatAuto-Cast is selected, and then click Side by side and so ClickFinish.


40 – Next, if y'all using VM as a demo, brand certain that youconfigure the VM for Pre-Kick EXecution Environment (PXE) Booting in your Hyper-V, for example here is my ain settings.

41 – Next, turn on the new Server that you want to install the Server 2022 using WDS, in my demo my server will exist NewHelpTech Server, when the server turn on,review the Client MAC ADDR, Client IP and Gateway IP, When prompted, printing F12 for Network Service Boot.

42 – now yous should see the admin blessing message.

43 – Now,return to WDS Server, In WDS, clickPending Devices, right-click the awaiting asking, and and then clickCorroborate.
 In the Pending Device dialog box, clickOK.
44 – Next, go to the NewHelpTech Server 2022 and you should see at present our NewHelpTech Server 2022 isloading files from the WDS server.

45 – If the loading files successful, WDS Windows Setup box will appear and you can proceed past clicking Side by side.

46 – Type a User Name and Password on DC-Cloud Server.

47 – Next, on the Select the operating system yous want to install, you lot should observe that Windows Server 2022 SERVERDATACENTER is listed, and so click Next to continue with installation.


 Startup your Server System.
that's all for now.., any Doubts type a commend.. 🙂

Source: https://newhelptech.wordpress.com/2017/07/13/step-by-step-how-to-windows-deployment-services-wds-in-windows-server-2016/
Posted by: lawsoncusufattion.blogspot.com
0 Response to "How To Install And Deploy Windows 10 Image With Wds"
Post a Comment